Making a counter in UltEvents is a bit… odd - like everything UltEvents.
First up, make a prefab. You’re going to be wanting to do this for all your logic bits, so I recommend making a folder that contains all of the UltEvents shenanigans - you can reuse them later on.
Make sure you’ve read Logic Workflow before continuing.
After you’ve made a prefab, set it up like this:
LogicFuncs(Make sure to add holders on each object under this)IncreaseDecrease
VarCounter
First off - the increase and decrease.
Storing ints is relatively simple - we just store them on an object’s position and later on round them (…because of float precision)
To change the value, we want to use Transform.Translate to increase and decrease the local position of the object. Now we choose the axis we want to store the number on, it doesn’t matter which one - but has to stay consistent. We’re going to use the x axis for now. If you want to set the counter to a number, and not just increase or decrease - you can set the local position (Transform.localPosition)
Here’s an example for increasing the counter:
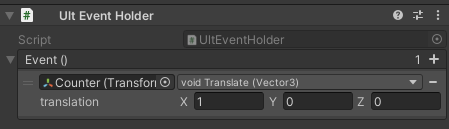
You’d want to do the same for decrease but replace the 1 with a -1.
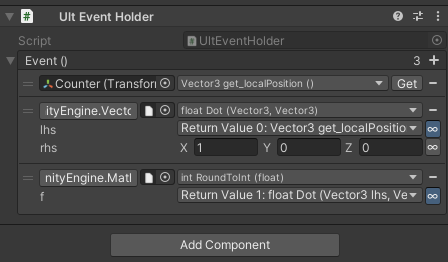
Now for getting the value - the fastest way would be getting the dot product of the local position and the vector 1,0,0 (Vector3.Dot).
See General Tricks and Tips for invoking static methods.
Then we’d want to round of that returned value, using Mathf.RoundToInt. You can use the little infinity sign at the bottom to use a return value. Eventually, it should look like something like this:
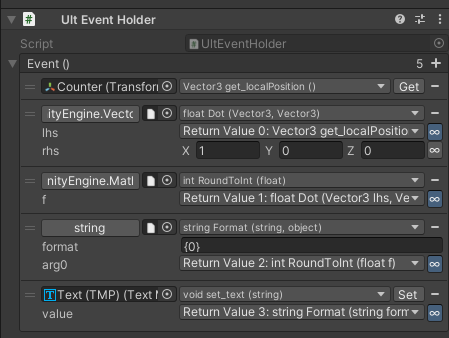
Currently, you just got the value - you can use that for a bunch of stuff. Here’s an example - I’m displaying the number on a TextMeshPro:
And that’s about it! Now you should have a fully working counter! Do as you please :)
Resources
SimpleCounter.prefab - A prefab for a counter that can be increased and decreased.