Beginning
Begin with an Extended SDK project and a prefab that includes whatever model you’re using. This guide does assume you have prior Unity + Modding experience.
The guide explains how to set up a basic vehicle based off the GoKart, I’ll only go over the required adjustments, for more information on optional values, see Vehicle Wheels
Before you do anything, I would suggest adding colliders however detailed you want, then move on in the guide.
The Root
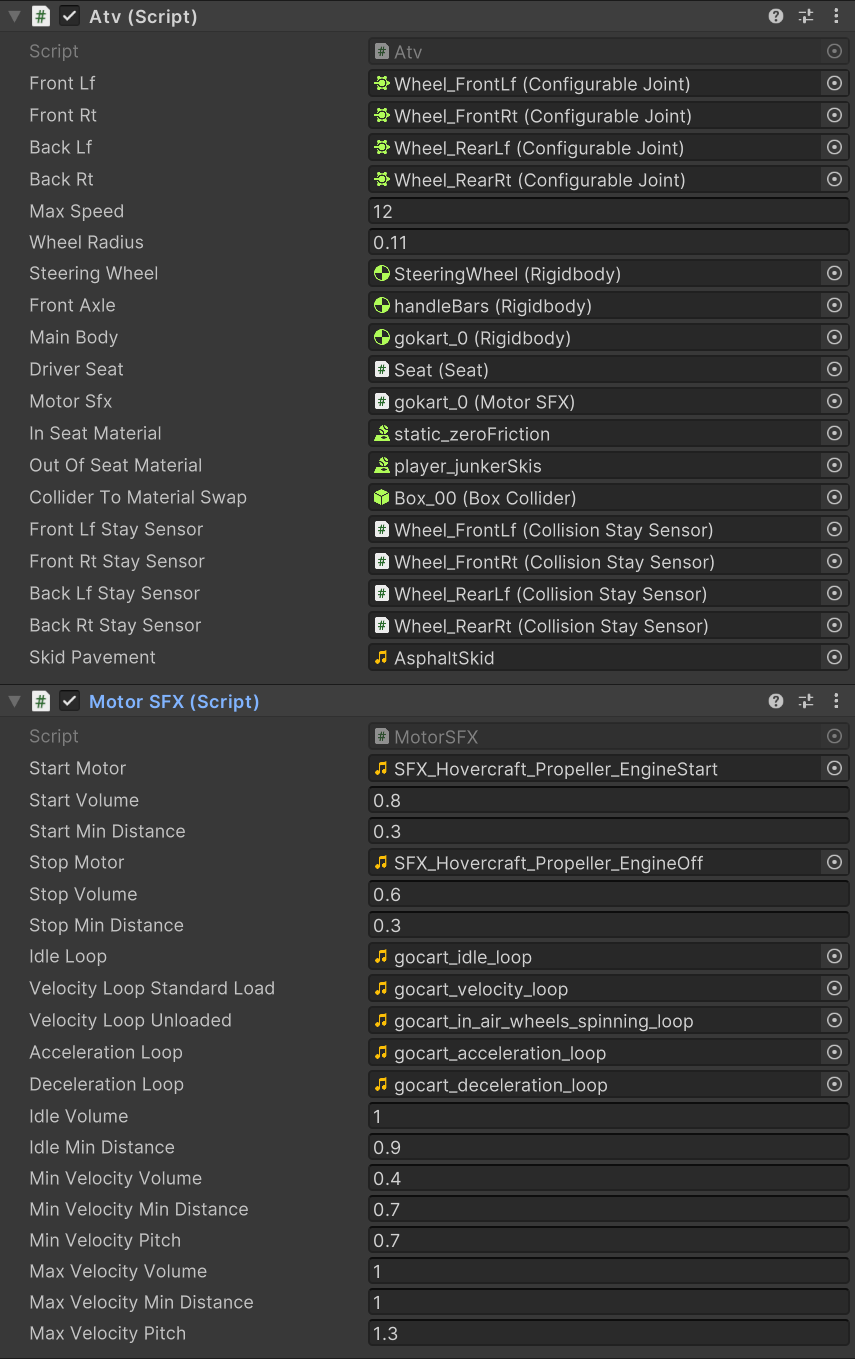
On the root of your prefab, add a Rigidbody, an ATV script, and the Motor SFX script.
- Set the Rigidbody to whatever mass you want
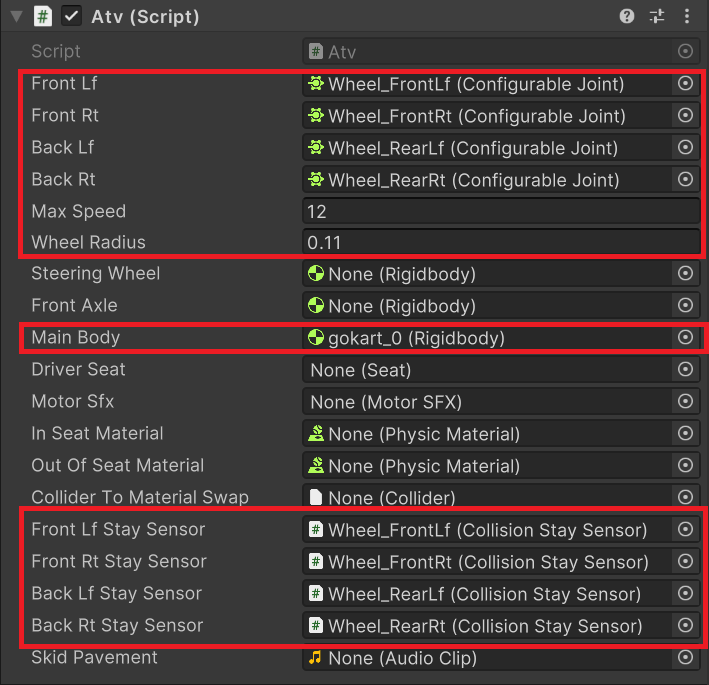
- Set the Main Body on the ATV script to your root prefabs Rigidbody
- Set Max Speed to whatever you want, the GoKart uses 12
(How it should look at the end of the guide)
The Wheels
You’ll need 4 Game Objects, Align each Game Object with the wheels on your model, then you’ll need to parent the mesh wheels under the one’s you just created. On each wheel you’ll need a:
- Rigidbody
- 1 Configurable Joint On All Wheels
- 1 More Configurable Joint On The Two Front Wheels
- Sphere Collider
- Test Contact Mod script
- Collision Stay Sensor script
Wheel Config Joints
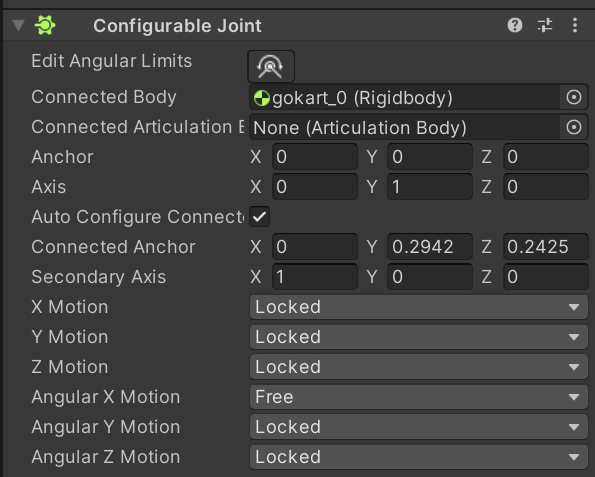
With all 4 wheels selected, set the Connected Body to the root of the prefab.
Now select the two front wheels, on the first config joint, set X Motion to locked, Y Motion to limited, Z Motion to locked, and all Angular Motion set to free.
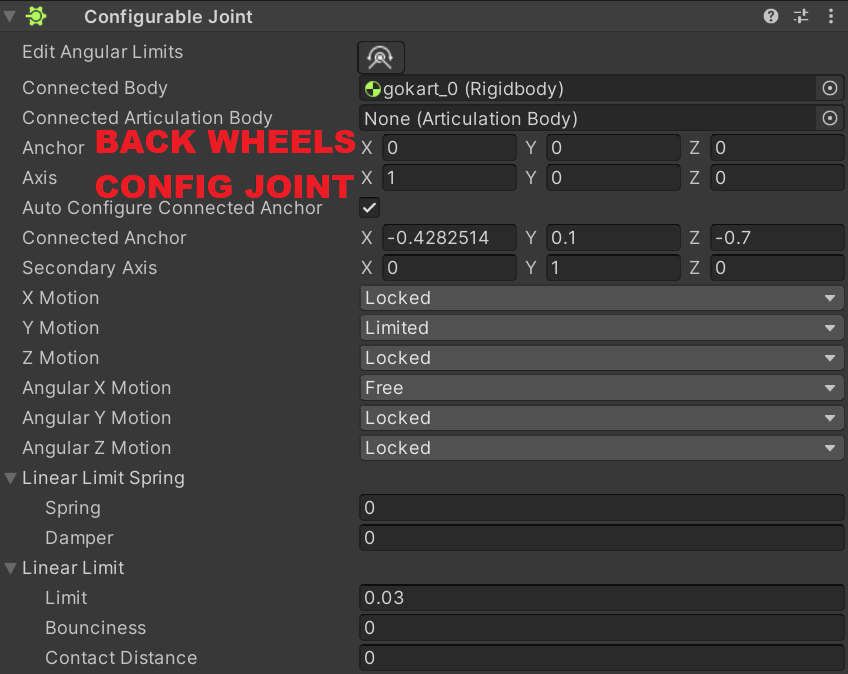
Now while selecting the two back wheels, set all motions the same, except Angular Y and Z motion locked.
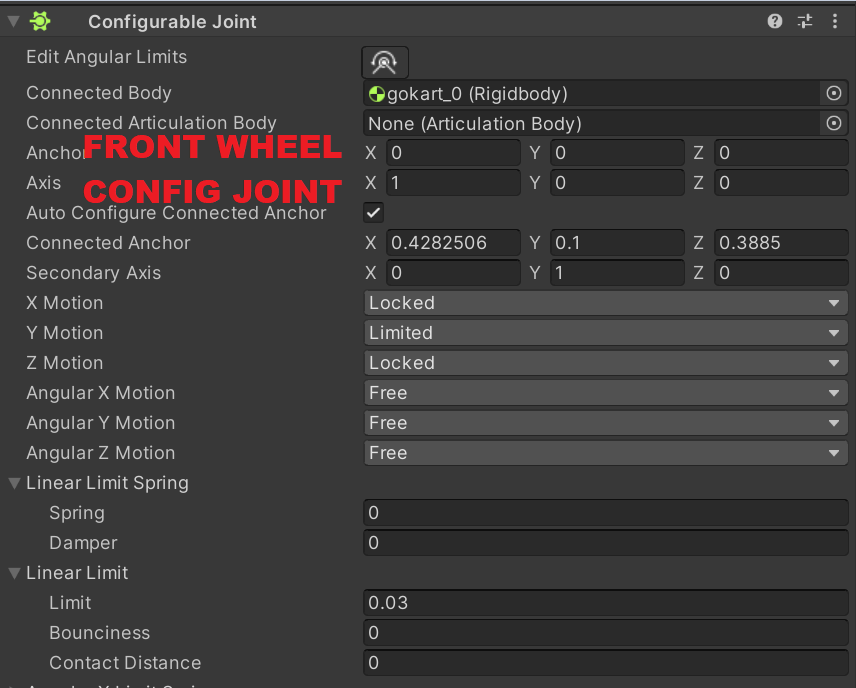
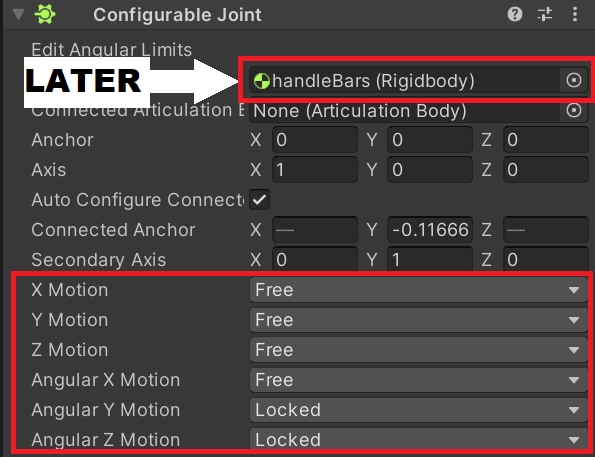
IMPORTANT!! If you haven’t already, we need to create a second config joint for the 2 FRONT wheels, otherwise it won’t work!! Now for the second, we’ll set the Connected Body later, set everything to free EXCEPT Angular Y and Z Motion, set those to locked. And that’s it for the config joints.
Wheel Sphere Collider
This is just so your wheels collide with the world, size it to fit your wheels, and make sure there won’t be any colliders overlapping with it.
Wheel Test Contact Mod
This component makes the vehicle have suspension. Set the Col and Rb to your wheels Sphere Collider and Rigidbody, MAKE SURE you select each individual wheel and do this, you can’t have every wheel selected and just drag them in. The rest of these values are up to you, for reference, what I’ve shown is what the GoKart does, but these settings of course vary on the weight of your car, what kind of car you’re going for, etc.

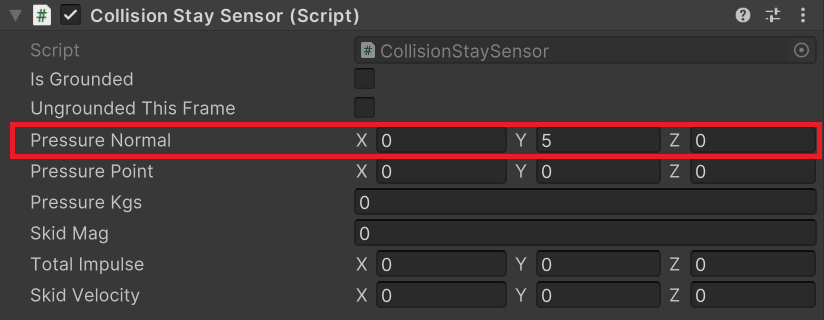
Collision Stay Sensor
It’s important that you have this component, but the settings are COMPLETELY up to you, this script simply determines how you want the vehicle to drift, I tend to just set Pressure Normal to 0, 5, 0, but this is your vehicle, not mine! There’s more information on what values do what in the Vehicle Wheels guide, but if you don’t have time, all you need to know is that the Y float in the Pressure Normal vector determines the drift sensitivity, the higher you set it the easier you drift.
Assigning Wheels
Go back to your ATV script on the root of the prefab, assign all the wheels accordingly at the top 4 Configurable Joints, then do the same at the bottom to all of the Collision Stay Sensors. Next match the Wheel Radius float to the radius on your Sphere Colliders. Congrats! You’ve finished making your wheels! Here’s what the ATV script should look like afterwards:
For more information on wheels, see the Vehicle Wheels guide.
The Steering Wheel
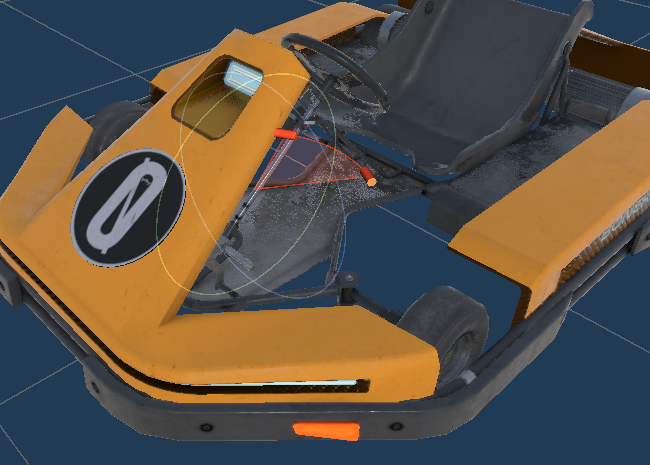
Make a new Game Object as the parent of your steering wheel, It’s very important the Game Object is rotated and aligned with the steering wheel mesh.
- Add a Rigidbody
- Configurable Joint
- Hinge Virtual Controller
- and Servo script
Again, Rigidbody mass can be set to anything you want. The Config Joint Connected Body should be set to the root, lock everything except Angular X Motion, set it to Free.
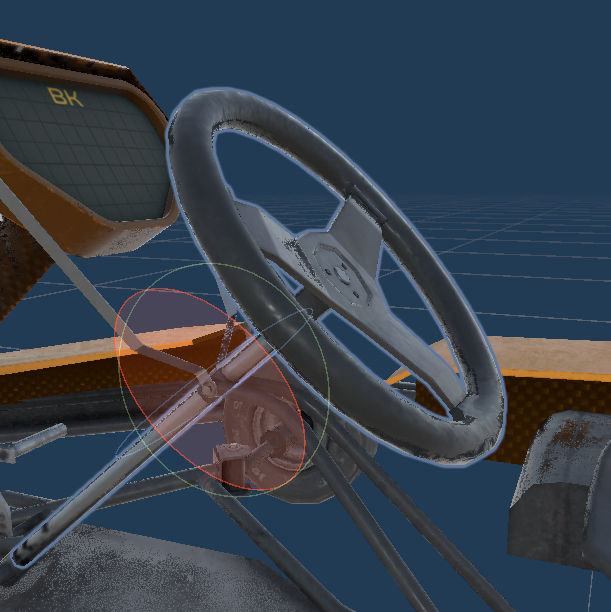
It is VERY IMPORTANT your steering wheel is oriented this way in the screenshot below, this guide took a whole extra day because I didn’t :D.
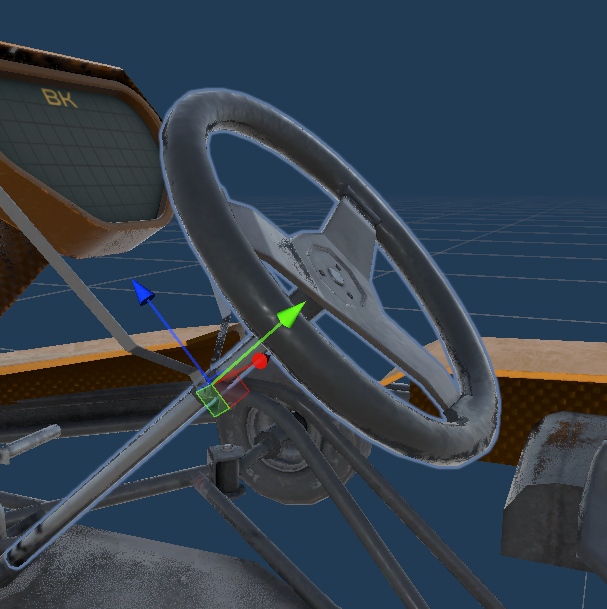
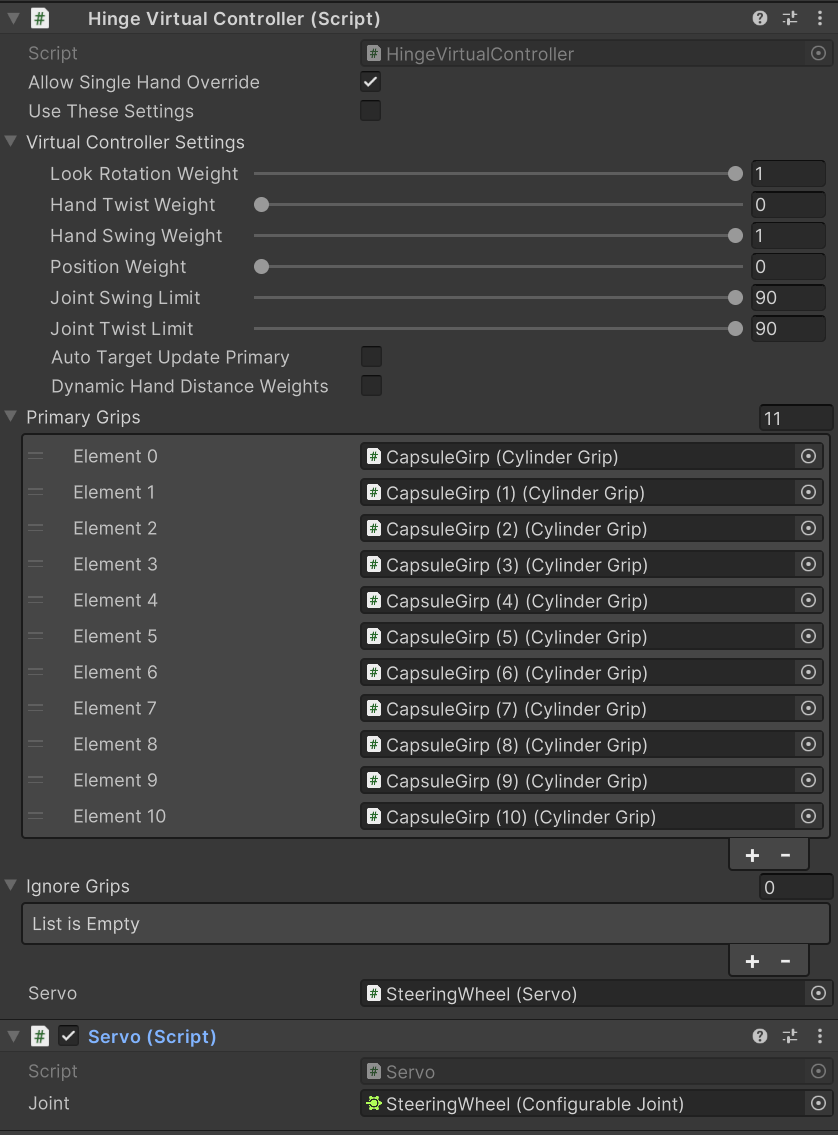
On the Servo script, drag in the config joint you just made.
On the Hinge Virtual Controller, enable Allow Single Hang Override (optional), drag in the Servo script at the bottom, and assign all the girps under your steering wheel to the Primary Grips. Under Virtual Controller Settings, set the values to: 1, 0, 1, 0, 90, 90, as far as I know, these settings aren’t optional, I’ve messed with them but these settings are the only ones that seem to work for me. That’s it for the steering wheel! Drag your steering wheel into the Steering Wheel Rigidbody on the ATV script.
The Handle Bars
Make a new Game Object called HandleBars, align the object in between your front wheels.
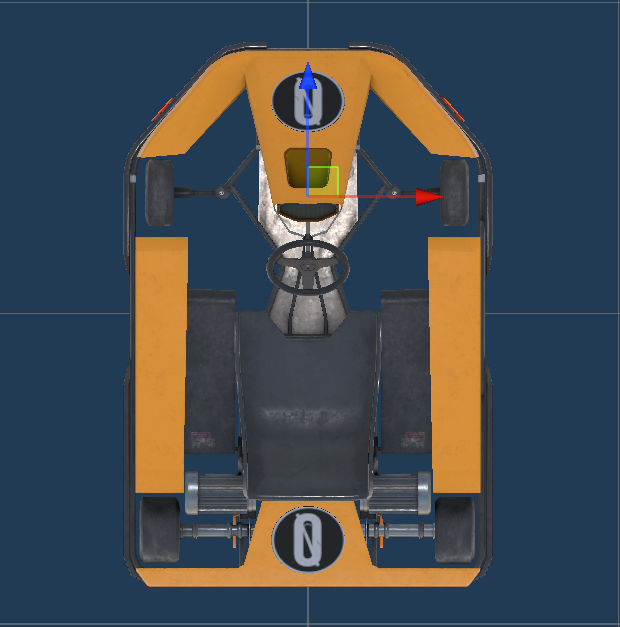
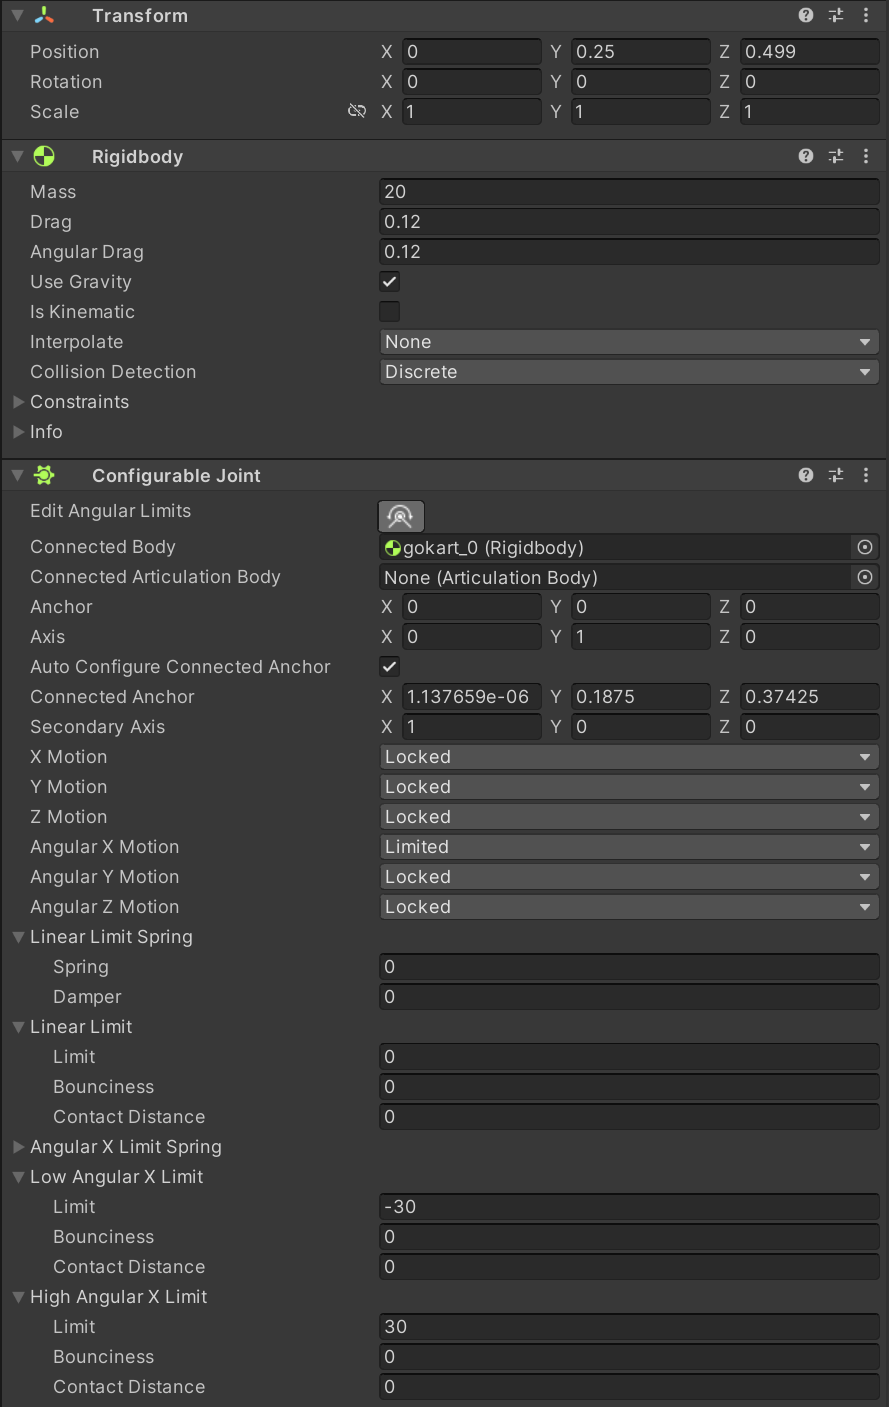
Add a Rigidbody and Configurable Joint. On the Rigidbody I set my axle’s mass to 15. Set the config joints Connected Body to the root with the ATV script, lock everything except the Angular X Motion, set it to limited. Under Low/High Angular Limit, change the limit, you can view how much you change using the Edit Angular Limits button, these settings are for how far you want your wheels to rotate, I like to do 30 and -30.
IT’S VERY IMPORTANT IT IS ORIENTATED THE SAME WAY IN THE SCREENSHOTS!!!! AS WELL AS THE BLUE ARROW FACING THE FRONT OF THE CAR WITH ALL ROTATIONS SET TO ZERO!!! LIKE SHOWN IN THE SCREENSHOT!!! If you can’t get it to all be rotated right, you can use the Axis vectors and secondary axis at the top of the config joint to change rotations, I did 0, 1, 0 and 1, 0, 0.
After you’ve finished all that, we can go back to our wheels! Selecting the TWO FRONT, in the Second config joint, assign the HandleBars as the Connected Body. Next, go to you ATV Script and assign the HandleBars to the Front Axle.
The Driver Seat
I won’t go over how to make a seat, as I’ve already made a separate guide, Seat. BUT once you have made the seat, assign it to the Driver Seat in the ATV script.
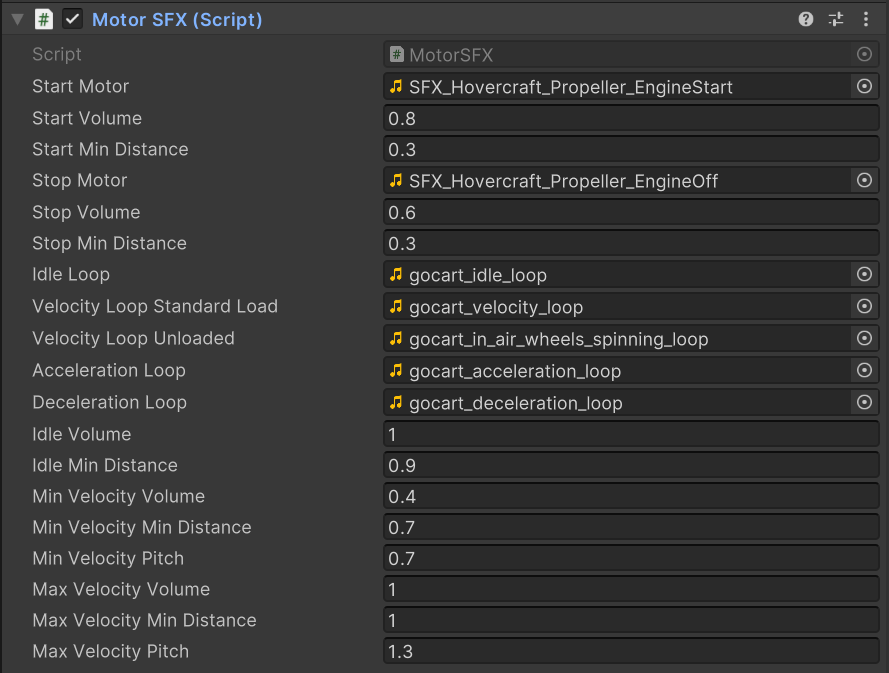
Motor SFX
All these settings pretty much explain themselves, and vary depending on what vehicle you’re going for, if you really don’t know what to do, here’s the GoKarts settings. And of course you’ll need your own sound effects. Make sure to assign the MotorSFX in the ATV script.
Populate Marrow Components
Right click your prefab and click Populate Marrow Components, this will apply many required components for your spawnable to work!!!
Done!
If I didn’t go over settings you’re confused about, they’re most likely optional, if you’ve found it’s breaking your vehicle, please message me on discord (sonofforehead)! Finally, go pack your vehicle, and test it out in game!
Warning and Prefab
Vehicles can break easily, despite having made many vehicles before, I still struggle to get them to work all the time, it’s likely it won’t work for you first try. I have made a working vehicle using this guide, which you can download here. What’s helped me the most when I really can’t figure out an issue is straight up copying the prefab 1 to 1, and the most common issue I have is the orientation of objects, don’t ask me why, but messing that up seems to break the car almost every single time, so be careful!